Stampin’ Up! Hearts Come Home Christmas card version 2

Stampin' Up! Hearts Come Home card with Maudiepapercrafts

So here it is, my last Christmas card this year. Unless I change my mind and make more of course, but that is unlikely.

Like my last post, these cards also use the Hearts Come Home stamp set, but this time I’ve teamed it with the Hometown Greeting edgelits. Aren’t those egdelits wonderful? Love them.

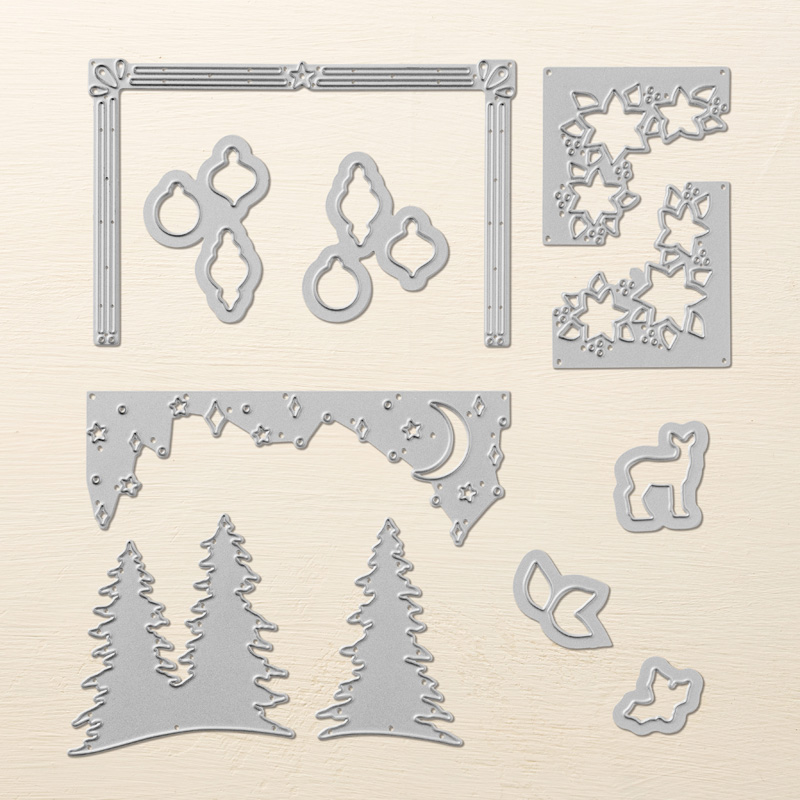
I used all three of the detailed dies for these cards, and layered them up. They are so cleverly done, with the top layer having a little gap so that the church spire from the next row down can fit in.

Stampin' Up! Hearts Come Home card with Maudiepapercrafts

For the sky I started with Pool Party card, then sponged some Dapper Denim on to it. It’s not completely smooth which gives it some dimension and it looks like a snowy sky I think.

You can see that I coloured the trees on one of the cards, and just added some Wink of Stella on the other.

Stampin' Up! Hearts Come Home card with Maudiepapercrafts

What took the most time when making these cards was popping out all the little bits from the die cuts!

What’s coming next? I don’t know, you’ll have to come back and see.


Table built using Product Table Builder by The Crafty Owl – Independent Stampin’ Up! Demonstrator.

Stampin’ Up! Hearts Come Home Christmas card

Stampin' Up! Hearts Come Home card from Maudiepapercrafts

This is the last but one Christmas card that I have to show you – if you haven’t made yours by now then you’re really leaving it til the last minute!

These cards use the Hearts Come Home stamp set. It’s available as a bundle with the Hometown Greetings Edgelits dies – buy the bundle and get 10% discount. See my next post for the Edgelits.

This is a simple card that looks great nonetheless. I die cut a circle from the Stiched Shape Framelits set and stamped in a house and trees from the stamp set. Not forgetting Santa of course!

Stampin' Up! Hearts Come Home card from Maudiepapercrafts

Then I added a silver or copper circle around it and put that on Whisper White mat that I had embossed using the Softly Falling embossing folder.

Add a heat embossed sentiment and you’re done!

Stampin' Up! Hearts Come Home card from Maudiepapercrafts

A little tip regarding the ink pads. My Real Red ink pad has always been so juicy that I’ve rarely used it. Well, I got fed up with that, what’s the point of having it and not using it? So, I ran the open pad across my grid paper to soak up some of the ink, and now it works like a dream!

So, if your ink pads seem a little juicy – if the bubble when you use them – try getting rid of some of the ink.

My next card also uses the Hearts Come Home stamp set with the matching edgelits.


Table built using Product Table Builder by The Crafty Owl – Independent Stampin’ Up! Demonstrator.


Stampin’ Up! Another Remarkable You card using Blends pens

Stampin' Up! Remarkable You using Blends pens at Maudiepapercrafts

Following on from my last post, here’s another card I made using the lovely Remarkable You stamp set and Blends pens.

For this one I made a mask from a Post It note and stamped the middle flower first, then the two behind it, and the leaves.

I used Pool Party, Calypso Coral and Pink Pirouette to colour the flowers. They really pop off the page don’t they.

Stampin' Up! Remarkable You using Blends pens at Maudiepapercrafts

Although I’ve done some colouring before, I’m certainly not an expert, but these pens  make it easy for you to get a great finish. I used both the dark and light pens in each colour. Maybe just having the two pens to blend with is what makes the difference. You can get a darker look by colouring over the top several times.

Again I used Memento Tuxedo black ink  to stamp with, and this time used the silver embossing powder and card for the little bird.

Stampin' Up! Remarkable You using Blends pens at Maudiepapercrafts

The DSP background is from the Fresh Florals stack it is Powder Pink but goes well with the Pink Pirouette pens I used.

One last thought about the Blends pens for now. While you can buy the complete set, which is obviously an investment, they are available separately too. This means you can buy a couple at a time to test them out if you want to. You can buy pairs of the light and dark too.

If you have any questions about them, or anything else to do with Stampin’ Up! please contact me.

Here’s what I used to make this card:


Table built using Product Table Builder by The Crafty Owl – Independent Stampin’ Up! Demonstrator.

Pootler’s Design Team – The Little Things week 4


Here’s my project for week 4 of my time on the Pootler’s Design Team – 5 Thursdays during November where 5 members of the Pootler’s team share projects made with The Little Things stamp set.

This week I’ve made 2 gift bags, one of them using the Gift Bag punch board:

Stampin' Up The Little Things gift bags

I don’t use the Gift Bag punch board as much as I should so after making one bag with the score board I thought I’d get out the punch board for the other.

Can you guess which is which? Hard to tell isn’t it – the black and white was made with the Gift Bag punch board.

I used the Merry Little Christmas DSP to make the bags. The cardstock is just the right weight, not too flimsy, and not too thick either.

Stampin' Up The Little Things gift bags

For the ribbon I used the Shimmer Ribbon in black, and also the Striped ribbon. The Striped ribbon is wired and so I used the Shimmer ribbon to go around the bag, then added the Striped ribbon bow on top.

The sentiments are heat embossed in gold. I think this sentiment is lovely, and you could just use the For My Sweet if you didn’t want the top.

Stampin' Up The Little Things gift bags

Both bags are the right size for putting some sweet goodies in – a lovely surprise for someone for Christmas!

Next Thursday is my last week on the Design Team. It’s gone so fast. Please come and and see what my last project is – hit the subscribe button so you don’t miss it.

Here’s what I used to make these bags (clicking on each image will take you to that item in my shop should you want to buy anything).


Table built using Product Table Builder by The Crafty Owl – Independent Stampin’ Up! Demonstrator.

Pootler’s Design Team – The Little Things week 3

It’s the third week of the Pootler’s design team challenge for me, and this week I decided to make some gift tags.

Our team leader Sam has challenged five of us to use The Little Things stamp set to make five projects – one for each Thursday during the month of November.

This week I combined the stripe that’s in the stamp set with the wonderful Cookie Cutter Christmas set that carried over from last year.

Stampin' Up! The Little Things meets Cookie Cutter Christmas

I used the stripe in either Old Olive or Real Red across the bottom of each tag, then added one of the crew from the Cookie Cutter Christmas set, and a sentiment at the top.

I found some googly eyes to add to the gingerbread men and reindeer.

Stampin' Up! The Little Things meets Cookie Cutter Christmas

To make each tag I used a piece of Thick Whisper White card cut at 4″ x 2″ (10cm x 5cm), then stamped the stripe across the bottom. Then I used the envelope punch board to round the corners.

Stampin' Up'! The Little Things meets Cookie Cutter Christmas

I used the Scalloped Tag Topper punch to punch out the tags and then finished them off with gold metallic ribbon.

I’d like to think that they’d make a great addition to any present!

For next week’s project – gift bags.

Here’s what I used to make the tags – click on an item to go to it in my shop.


Table built using Product Table Builder by The Crafty Owl – Independent Stampin’ Up! Demonstrator.

Pootler’s Design Team – The Little Things, week 2

Welcome to my second project for the Pootler’s Design Team. I’ll be posting a new project each Thursday in November using The Little Things stamp set.

This week I have used the December Deliciousness stamp – what a great sentiment!

I wanted to make some little treat bags and thought I’d make some tags to hang around the top.

Stampin' Up! The Little Things


I love those little candy canes and ginger bread men. I heat embossed the sentiments in gold, copper and silver, and used the Stitched Framelits to die cut them. Then I added some sweets to clear bags and attached the tags using either gold metallic edge ribbon or black shimmer ribbon.

As you can see I also made some crates using the wood crates framelits. I wanted to see what different designs would look like so I made three crates, each different.

Stampin' Up! The Little Things

I used wood textures DSP on one (with a foil snowflake), Merry Music DSP on another, and more wood textures DSP that I stamped for the third.

I glued each piece of DSP to a piece of carstock before I die cut them to make a very sturdy crate – you will need to burnish well if you try this.

Stampin' Up! The Little Things

I think I might take these to a Christmas craft fair where I have booked a table at the beginning of December. I hope you like this week’s project – don’t forget to come back and see what I have made next week.

This is what I used for this week’s makes:


Table built using Product Table Builder by The Crafty Owl – Independent Stampin’ Up! Demonstrator.

Stampin’ Up! Carols of Christmas tags

Stampin' Up! Carols of Christmas tags

I haven’t seen many tags made with the Carols of Christmas bundle so I thought I’d make some. I’ve used the Merry Music speciality DSP for the background.

To make these tags I used Whisper White card stock cut to 2″ x 4″ then adhered some of the DSP (cut to the same size) to it.

Then I used the Scalloped Tag Topper punch to make tags and rounded the corners using the envelope punch board.

Stampin' Up! Carols of Christmas tags

As you can see I just used black and white card for the trees and copper and  silver for the deer. The ribbon is not Stampin’ Up! but goes well with the black and white I think.

I have another Carols of Christmas card to show you in the next post, with lots of glitter!

Don’t forget that the but 3 packs of DSP get one free offer is only open until the end of October, so if you want some don’t leave it too long and miss out.


Table built using Product Table Builder by The Crafty Owl – Independent Stampin’ Up! Demonstrator.

Colourful Seasons birthday card from Stampin’ Up!

Stampin' Up! colourful Seasons


I made this card for my father-in-law for his birthday. He likes the sea so I thought he might like this card too! I’ve tried to make it a tranquil card, and I think I succeeded.

I die cut a circle out of some scrap paper and sponged the sand, sea and sky in the middle, it’s an effective technique to use.

Then I added the die cuts from the Colourful Season bundle. This is such a diverse set with extra dies that don’t match any stamps, the Adirondack chair being one of them. Aren’t the cherry blossoms cute too.

Stampin' Up! colourful Seasons

I stamped on the birds afterwards. The sentiment and the wading birds come from the now sadly retired Wetlands stamp set, but there are currents sets with birds that you could use instead. One of them is the High Tide stamp set – the flying birds are from that set but there are wading birds in it too.

The Colourful Seasons bundle has lots of stamps and dies for all seasons so I’ll definitely be using it again, I feel like I’ve barely begun to use it to its full potential.

Stampin' Up! colourful Seasons

Stampin’ Up! have a video which shows more of this great bundle:


Back soon!


Table built using Product Table Builder by The Crafty Owl – Independent Stampin’ Up! Demonstrator.

Magical Mermaid from Stampin’ Up!

Stampin' Up! Magical Mermaid card

Another whimsical card today, and another stamp set that I resisted for a while before deciding to buy it.

There are no dies with the stamp set so you’ll need to fussy cut the mermaid yourself if you want to give her some dimension, but she’s not difficult to cut around.

I used watercolour paper and first added a wash of Pool Party and Sahara Sand, then stamped the shells and weed over the top of them.

Stampin' Up! Magical Mermaid card

I used a variety of colours on the mermaid’s tail, then cut her out and added her with some dimensionals.

I wanted to add the sentiment right in the middle so I did that first, then added the mermaid afterwards.

I’m pleased with this card, it’s understated but effective I think.

Stampin' Up! Magical Mermaid card

Changing the subject slightly! I have Holiday season catalogues in the house – yay!

I’ll be doing some sneak peeks of what’s inside in the next couple of weeks so watch this space.


Table built using Product Table Builder by The Crafty Owl – Independent Stampin’ Up! Demonstrator.

Carols of Christmas from Stampin’ Up!

It’s August so it must be Christmas, yippee! Stampin’ Up! have released a bundle – stamp set and dies -from their new Seasonal Catalogue early. You can buy it throughout August, before the Seasonal Catalogue goes live on September 1st.

Here it is:

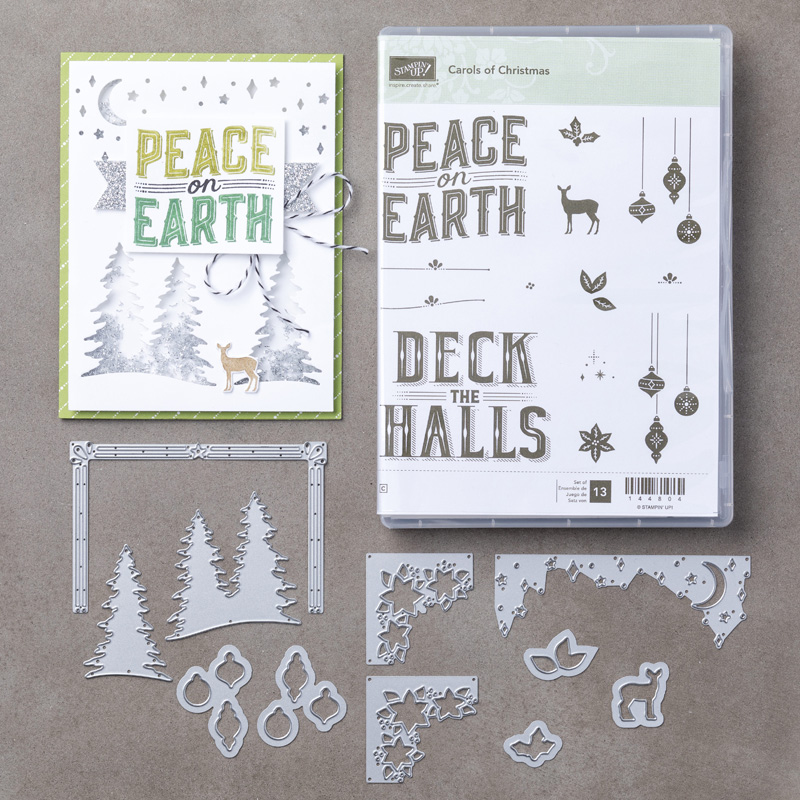
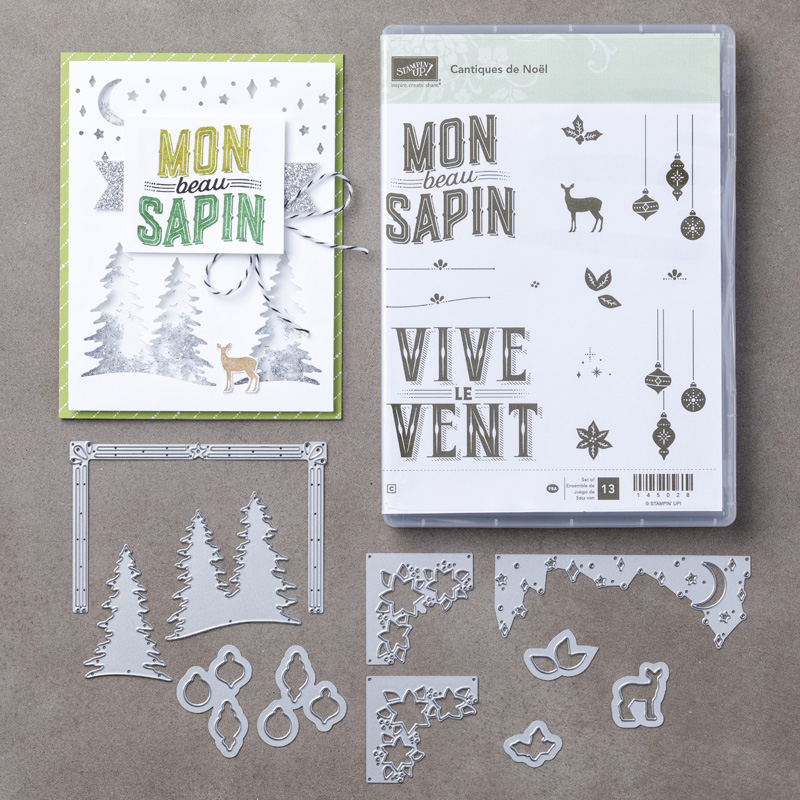
 I’ve had a little play, and there are lots of different combinations. This card uses the tree dies and one of the large seentiments.


Here are some more samples:

Click on the images in the table below if you’d like to buy – the bundle is available at a 10% discount – (€54/£40.50 for clearmount), or you can buy the stamp set and die set separately.

Here’s the video that Stampin’ Up! have made showcasing the bundle;

Now then, if you like this, and would like to get your hands on more seasonal stuff before September 1st there is a way. If you become a demonstrator in the month of August you’ll be able to order from the new catalogue – contact me for more details if you live the UK, France, the Netherlands, Germany or Austria.

More soon!


Table built using Product Table Builder by The Crafty Owl – Independent Stampin’ Up! Demonstrator.