Stampin’ Up! Christmas card using Lovely as a Tree eclipse technique

Stampin' Up! Lovely as a Tree eclipse Christmas card from Maudiepapercrafts

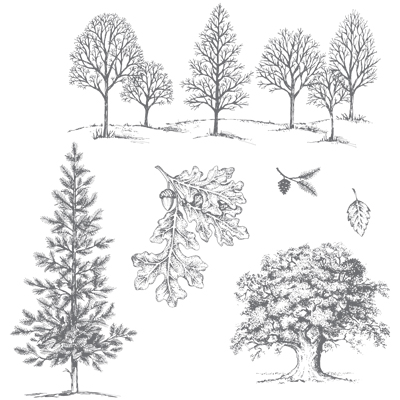
I wanted to make a Christmas card that used trees, and the only set I have that has trees is Lovely as a Tree. Then I wanted to use my lovely new Large Letters Framelits, and Softly Falling embossing folder. I had it all planned in my head, then found that Jan Clothier – a demo in New Zealand – had made the exact card that I had planned already! I guess that does happen sometimes.

This is such a striking card that I have made several to give to family members. You do need to make it in a certain way to get it all to work properly.

Stampin' Up! Lovely as a Tree eclipse Christmas card from Maudiepapercrafts

The first step is to blend in your snow banks, and then stamp your trees. I stamped mine so that that part of them would be cut out with the framelits.

Then add the Noel word from you Large Letter Framelits and die cut it out, making sure to keep the middle bit from the O.

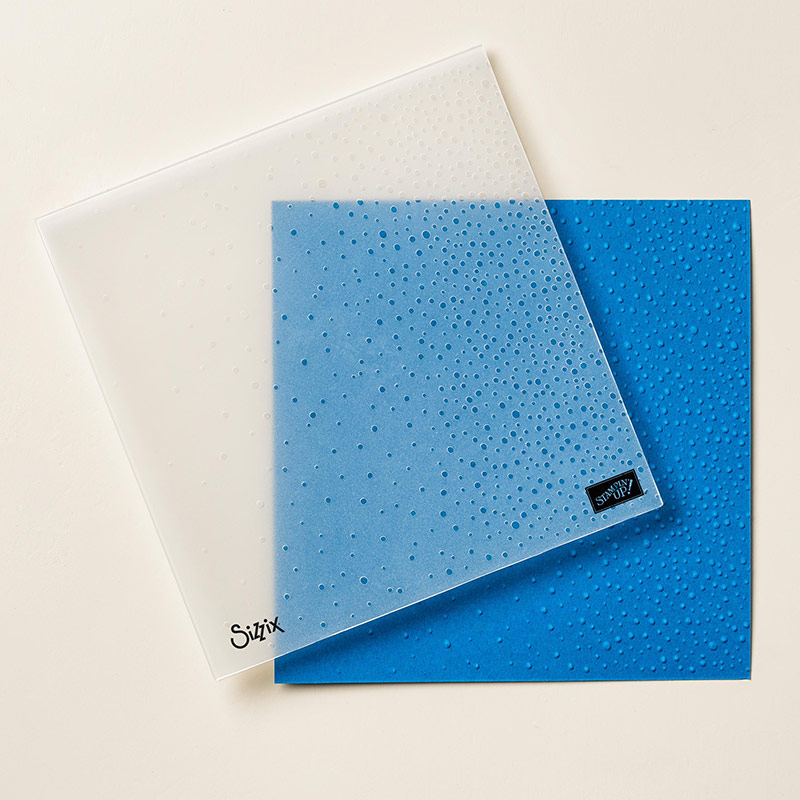
Then, use the Softly Falling embossing folder to emboss the snow. Put the middle bit from the O in somewhere so that it fits with everything else.

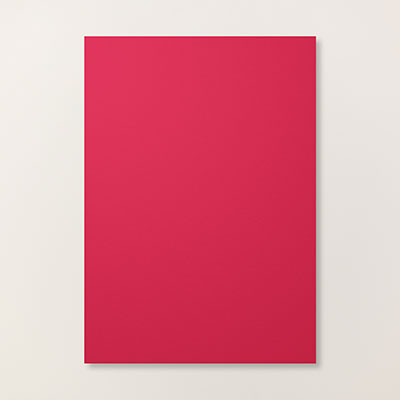
Then you can add back your letters to the card. I used a Real Red background to contrast against the white.

Stampin' Up! Lovely as a Tree eclipse Christmas card from Maudiepapercrafts

The last step was to add some glitter to the trees which doesn’t show up well in the photos, but does make a difference.

Hope you like it!

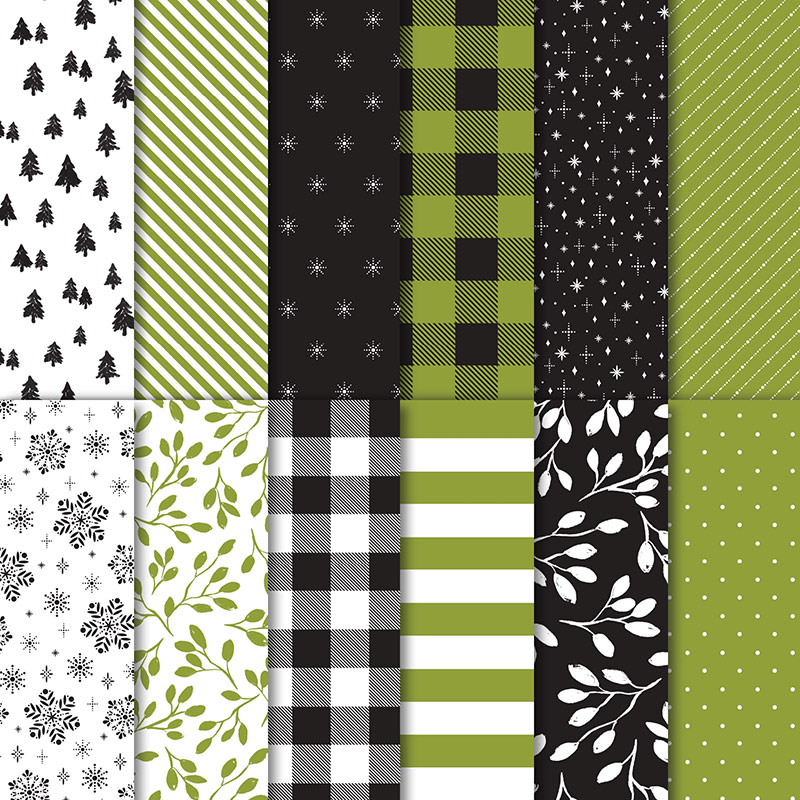
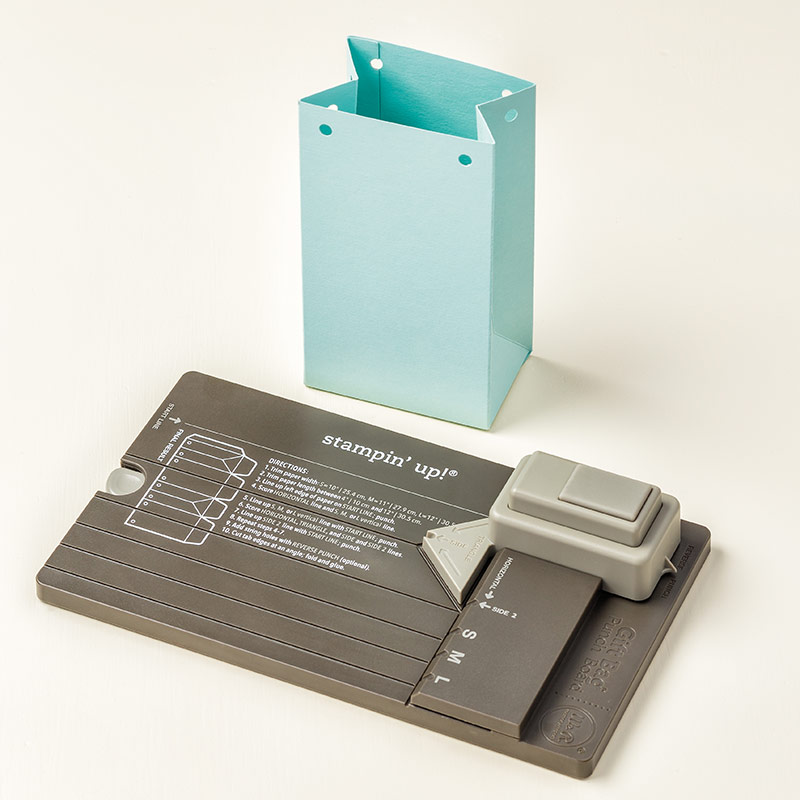
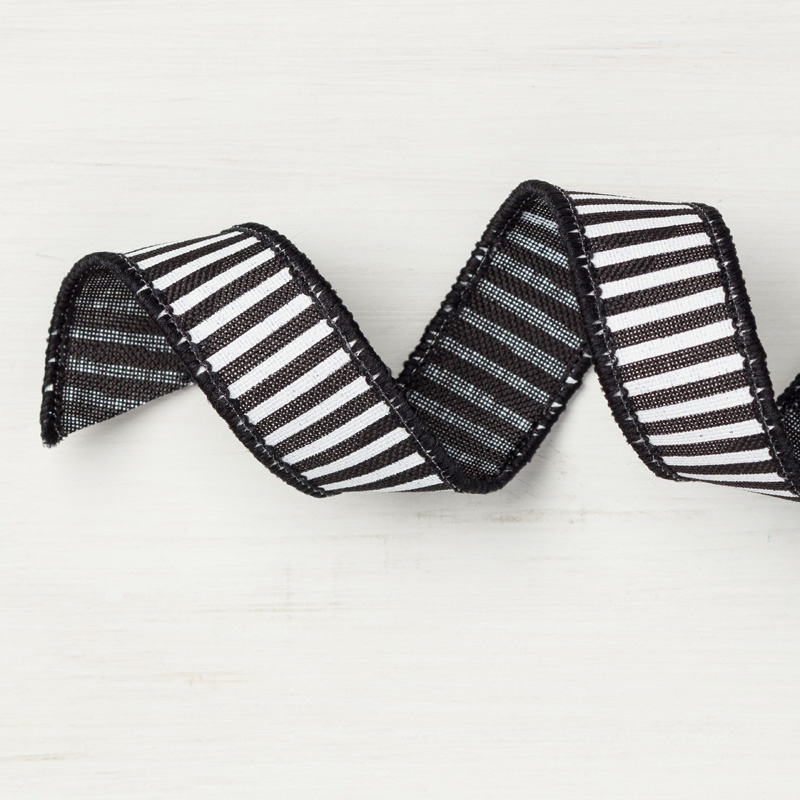
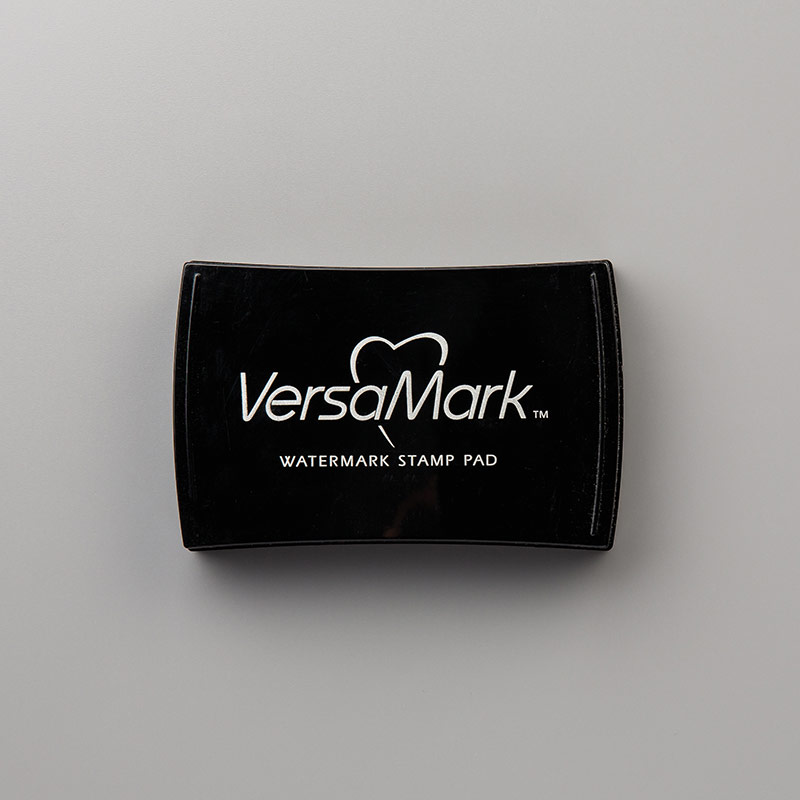
This is what I used to make the card:


Table built using Product Table Builder by The Crafty Owl – Independent Stampin’ Up! Demonstrator.

Stampin’ Up! Half Full birthday card

Stampin' Up! Half Full birthday card from Maudiepapercrafts

I CASE’d this card from one I found on Pinterest by Paula Dobson. I needed a birthday card, and this fitted the bill perfectly!

I’ve mentioned before how much I like this stamp set, not least because I know I’ll use every stamp in the set. There is usually a stamp in each set that you are unlikely to use isn’t there? Well not in this set – not for me anyway.

I used watercolour paper and my Stamp-a-ma-jig to repeatedly stamp out the bottle and glass with Memento Tuxedo black ink.

Stampin' Up! Half Full birthday card from Maudiepapercrafts

Then I used Aqua Painters to paint the bottle and glass. For the bottles I used Pear Pizzazz, and for the glasses Real Red and So Saffron. I used a watered down wash of Crumb Cake for the labels.

I popped up the sentiment – may your glass always be half full – on the front of the card.

Stampin' Up! Half Full birthday card from Maudiepapercrafts

For the cardbase I used Fresh Fig which seemed to go well with the wine theme, and added some Whisper White on the inside to write on.

I hope this set gets carried over to next year!

Here’s what I used to make the card:

Table built using Product Table Builder by The Crafty Owl – Independent Stampin’ Up! Demonstrator.

Pootler’s Design Team – The Little Things week 5

I can’t believe it, my last week on the Pootler’s Design Team. Thanks so much to my wonderful upline Sam for giving me the chance to bring these projects to you – 5 projects made using The Little Things stamp set.

This week I’ve made a box in a card that you may have seen on Pinterest or other social media. I have to give my credit to Dawn Griffiths for the box, but I think Rachel Tessman may have been an earlier designer.

Stampin' Up! The Little Things box in a card

For the box I used the Clear Tiny Treat boxes – they are 2″ x 2″ x 2″ (5.1cm x 5.1cm x 5.1cm) so just the right size to fit something tiny but delicious or adorable, or both in. They also fit in the card beautifully.

To make this card you need to cut a 2″ x 2″ (5.1cm x 5.1cm) hole out of the card 1″ (5.1cm) in from the edge. Cut through both pieces of card.

Stampin' Up! The Little Things box in a card

For the DSP background I used the Lemon Lime Twist from the Fresh Florals DSP, and added some red berries with my Real Red marker to make it look more festive. The trees along the strip at the bottom are from the Hearts Come Home stamp set.

I heat embossed the sentiment in gold, and die cut it using the Layering Ovals framelits.

Stampin' Up! The Little Things box in a card

I hope you’ve enjoyed seeing my projects as much as I’ve enjoyed making them!

Look out for Christmas ideas coming in the next few weeks.

Here’s what I used to make this card:


Table built using Product Table Builder by The Crafty Owl – Independent Stampin’ Up! Demonstrator.

Stampin’ Up! Another Remarkable You card using Blends pens

Stampin' Up! Remarkable You using Blends pens at Maudiepapercrafts

Following on from my last post, here’s another card I made using the lovely Remarkable You stamp set and Blends pens.

For this one I made a mask from a Post It note and stamped the middle flower first, then the two behind it, and the leaves.

I used Pool Party, Calypso Coral and Pink Pirouette to colour the flowers. They really pop off the page don’t they.

Stampin' Up! Remarkable You using Blends pens at Maudiepapercrafts

Although I’ve done some colouring before, I’m certainly not an expert, but these pens  make it easy for you to get a great finish. I used both the dark and light pens in each colour. Maybe just having the two pens to blend with is what makes the difference. You can get a darker look by colouring over the top several times.

Again I used Memento Tuxedo black ink  to stamp with, and this time used the silver embossing powder and card for the little bird.

Stampin' Up! Remarkable You using Blends pens at Maudiepapercrafts

The DSP background is from the Fresh Florals stack it is Powder Pink but goes well with the Pink Pirouette pens I used.

One last thought about the Blends pens for now. While you can buy the complete set, which is obviously an investment, they are available separately too. This means you can buy a couple at a time to test them out if you want to. You can buy pairs of the light and dark too.

If you have any questions about them, or anything else to do with Stampin’ Up! please contact me.

Here’s what I used to make this card:


Table built using Product Table Builder by The Crafty Owl – Independent Stampin’ Up! Demonstrator.

Stampin’ Up! Remarkable You card using Blends Markers

Stampin' Up! Remarkable You card with Blends pens

Oooh, I love this card! I wanted to try out my new Blends pens and thought the Remarkable You stamp set would be a good one to use because the flowers are quite large. I used both the light and dark Pumpkin Pie. I love orange and think this looks great.

I paired it with the Lemon Lime Twist DSP from the Fresh Florals DSP – the orange and green go well together don’t they.

Stampin' Up! Remarkable You card with Blends pens

I used Memento Tuxedo Black to stamp the image on Whisper White cardstock and gave it a minute or two to dry.

It doesn’t matter whether you use use dark pen or light pen first, you can still blend with them. It is easier though if the ink is still wet. It is normal to get some bleed through of the ink so remember to put something under your card.

Stampin' Up! Remarkable You card with Blends pens

Then I added gold accents. I’d always choose silver before gold, but this needed a warm gold to complement it.

The Happy Birthday sentiment is from the Best Birds stamp set. I heat embossed it, and while I had the set out I remembered that there was a little bird in the framelits which could sit next to the sentiment. Et voilà finished!

I have another card using Remarkable You and Blends pens for my next post. Be sure to check in and take a look.

Here’s what I used to make this card:


Table built using Product Table Builder by The Crafty Owl – Independent Stampin’ Up! Demonstrator.

Pootler’s Design Team – The Little Things week 4


Here’s my project for week 4 of my time on the Pootler’s Design Team – 5 Thursdays during November where 5 members of the Pootler’s team share projects made with The Little Things stamp set.

This week I’ve made 2 gift bags, one of them using the Gift Bag punch board:

Stampin' Up The Little Things gift bags

I don’t use the Gift Bag punch board as much as I should so after making one bag with the score board I thought I’d get out the punch board for the other.

Can you guess which is which? Hard to tell isn’t it – the black and white was made with the Gift Bag punch board.

I used the Merry Little Christmas DSP to make the bags. The cardstock is just the right weight, not too flimsy, and not too thick either.

Stampin' Up The Little Things gift bags

For the ribbon I used the Shimmer Ribbon in black, and also the Striped ribbon. The Striped ribbon is wired and so I used the Shimmer ribbon to go around the bag, then added the Striped ribbon bow on top.

The sentiments are heat embossed in gold. I think this sentiment is lovely, and you could just use the For My Sweet if you didn’t want the top.

Stampin' Up The Little Things gift bags

Both bags are the right size for putting some sweet goodies in – a lovely surprise for someone for Christmas!

Next Thursday is my last week on the Design Team. It’s gone so fast. Please come and and see what my last project is – hit the subscribe button so you don’t miss it.

Here’s what I used to make these bags (clicking on each image will take you to that item in my shop should you want to buy anything).


Table built using Product Table Builder by The Crafty Owl – Independent Stampin’ Up! Demonstrator.

Stampin’ Up! Online Extravaganza


Yippee! Stampin’ Up! have an Online Extravaganza from 20 – 26 November. Prices vary from 10% to 40% discount.

Some items are available on 20 November ONLY, so don’t hang around if you want anything. You can see the stuff available by downloading a PDF HERE.

There are some great offers on stamp sets, dies and more here. Please don’t wait if you want something, you might miss out.

Happy Shopping!

Pootler’s Design Team – The Little Things week 3

It’s the third week of the Pootler’s design team challenge for me, and this week I decided to make some gift tags.

Our team leader Sam has challenged five of us to use The Little Things stamp set to make five projects – one for each Thursday during the month of November.

This week I combined the stripe that’s in the stamp set with the wonderful Cookie Cutter Christmas set that carried over from last year.

Stampin' Up! The Little Things meets Cookie Cutter Christmas

I used the stripe in either Old Olive or Real Red across the bottom of each tag, then added one of the crew from the Cookie Cutter Christmas set, and a sentiment at the top.

I found some googly eyes to add to the gingerbread men and reindeer.

Stampin' Up! The Little Things meets Cookie Cutter Christmas

To make each tag I used a piece of Thick Whisper White card cut at 4″ x 2″ (10cm x 5cm), then stamped the stripe across the bottom. Then I used the envelope punch board to round the corners.

Stampin' Up'! The Little Things meets Cookie Cutter Christmas

I used the Scalloped Tag Topper punch to punch out the tags and then finished them off with gold metallic ribbon.

I’d like to think that they’d make a great addition to any present!

For next week’s project – gift bags.

Here’s what I used to make the tags – click on an item to go to it in my shop.


Table built using Product Table Builder by The Crafty Owl – Independent Stampin’ Up! Demonstrator.

Stampin’ Up! New Stamparatus stamp positioner

I have some exciting news for you today, about the new Stamparatus stamp positioning tool that Stampin’ Up! is releasing!

It’s something that demonstrators have been asking for for a long time, and now we are going to get one. This is what it looks like:

It has a magnetised bottom and comes with two bar magnets to hold your card in place. Plus, it has two removable flaps to do the stamping.

There is a mat to add for photopolymer stamps that you can take out if you want to use rubber stamps.

The cost is €59/£44.

So, down to the nitty gritty. How do you get your hands on one?

Well, Stampin’ Up! are trying a new system because they know how popular this product is going to be. You can reserve one. There are three reservation windows – 16- 30 November (for delivery approx 1 Feb 2018), 5 – 30 December (for delivery approx 19 March 2018) and 15-30 January (for delivery approx 15 April 2018).

You can reserve one Stamparatus during each window. You won’t be charged until the product is actually available, when you will receive an email about it. You can cancel a reservation at any time.

To reserve one you will need a customer account – click on the link in the sidebar to go to my shop and open one if you don’t already have one.

If you have any questions, please feel free to contact me. Demonstrators are getting their hands on this new piece of kit at the same time as customers so we won’t have used it before you!

Stampin’ Up! have released a video telling you everything you need to know about it: